Happy Thursday, All! I'm back today with another fun project…this time from Cindee! Cindee taught Patty and I a watercolor technique using Stampin' Up!'s Watercolor Paper, Aqua Painter and salt. Interesting, right?!
The Steps:
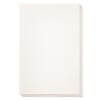
- On a piece of Watercolor Paper, paint it sufficiently with water using an Aqua Painter.
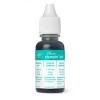
- Using the Ink Refill of your choice, dabble a few drops onto the water-covered portion of the Watercolor Paper and spread around with the Aqua Painter.
- Sprinkle with a few pinches of salt (Kosher salt works best) and watch the color move around. Set aside and allow to completely dry (takes approximately 10-15 minutes).
- Wipe off any excess salt with a paper towel once dry.
- Put the watercolor portion of the card front into the Ampersand Embossing Folder.
- Take a Stampin' Sanding Block and lightly sand the embossed image.
- Embellish card front and adhere to your card base.
As you can see, the ink ran down my paper a bit. But in the words of Tim Gunn of Project Runway, I "made it work."
I really like the watercolor effect Cindee taught us and love how she had us embellish the Ampersand with the rhinestones. We used the three different size rhinestones in the Rhinestones Basic Jewels pack. What great detail they add!
I LOVE this card, and now I have a new technique in my toolbox to try again and again. I must say that Cindee is the "Queen of New Techniques." She always keeps it fresh, and I always learn something new from her.
So, what do you think? Is this Watercolor Technique something you might try? Please let me know by leaving me a comment in the box below.
So, what do you think? Is this Watercolor Technique something you might try? Please let me know by leaving me a comment in the box below.
That's all for today, but be sure to check out Cindee's and Patty's creations as well. Just click on the links below to be taken to their blogs.
Be sure to stop by tomorrow for our last stop on the Mini Blog Hop with Patty's adorable project. You will find all of the products we used to make this card is listed below. Order what you need by going to my Online Store, or click any of the links below to go right to that item.
Thanks for stopping by today and happy crafting!
Shop in my Online Store (It's open 24/7!)
Earn FREE Products during Sale-A-Bration!
This Week's Weekly Deals HERE!
Join my Team HERE!
Earn FREE Products during Sale-A-Bration!
This Week's Weekly Deals HERE!
Join my Team HERE!
SUPPLIES ::






2 comments:
This looks very interesting. Think I am going to have to give it a whirl at least once -- after my weekly grocery trip since I don't have any Kosher salt. Like how you masked off the sentiment area. Thanks for sharing.
Hi Carol! Don't get me wrong…the technique will work fine with regular salt that you already have in the pantry, but according to Patty, the Kosher salt yields bigger results. We actually used regular (iodized) salt, and it worked well. I hope this helps?
Post a Comment
Thank you for taking the time to share your thoughts with me. I really appreciate it!