


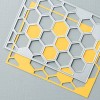
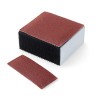
Hi Friends! I'm back today with another exciting project…this time designed by Patty! Patty tried out this fun double die cutting technique using Stampin' Up!'s Hexagon Hive Thinlits Die and Hearts Collection Framelits Dies, and couldn't wait to share it with Cindee and me.

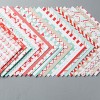
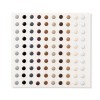
"What did you do to create this card," you ask? Well, Patty did the initial legwork by die cutting several pieces of Stampin' Up!'s Fresh Prints Designer Series Paper Stack. Then, Cindee and I had the fun of picking the hexagons we wanted for our "quilted" heart.

The Steps:
- Adhere the Hexagon Hive die cut in Real Red to a piece of lightweight copy paper.
- Cover the lightweight copy paper with SNAIL and adhere the Hexagon Hive die cut in Real Red to it.
- Fill in the blank spaces with the Fresh Prints Designer Series Paper Stack hexagons.
- Take the 2nd largest heart in the Hearts Collection Framelits Dies and die cut the section you want for your card (see below).

How nifty is this?! Talk about bright, bold and oh-so adorable! I LOVE this technique just as much as Cindee's watercolor technique!

All of our cards are slightly different because we used different backgrounds and hexagon shapes. So, whatever you do today, please be sure to stop by both Cindee and Patty's blogs to see what they came up with. Just click on the links below to be taken to their blogs.
Well, this concludes our Mini Blog Hop, and I hope the that you have enjoyed it! Be sure to check out Day 1 and/or Day 2, if you missed either of those projects.
You will find all of the products we used to make this card is listed below. Order what you need by going to my Online Store, or click any of the links below to go right to that item.
Thanks for stopping by today and happy crafting!

Shop in my Online Store (It's open 24/7!)
Earn FREE Products during Sale-A-Bration!
This Week's Weekly Deals HERE!
Join my Team HERE!
Earn FREE Products during Sale-A-Bration!
This Week's Weekly Deals HERE!
Join my Team HERE!
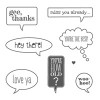
SUPPLIES ::


