Showing posts with label Tutorials. Show all posts

Monday, August 1, 2016

Birthday Fiesta Shaker Card & A TUTORIAL!

Eeeks, was this Birthday Fiesta Shaker Card a fun one to make!  I saw it so clearly in my head before I sat down to create, so I quickly sketched it out and got right to work.

The Festive Birthday Suite is so fun to work with!  Remember my Birthday Fiesta CardI don't know which one I like more.

For this card, I used the Birthday Fiesta Stamp Set, Festive Birthday Designer Series Paper, Fiesta Time Framelits Dies and Layering Circle Framelits.  Below are several pictures of the card from all angles and a picture tutorial as well.


The streamers across the top are my favorite addition to this card!


Isn't that llama cute?!


Here he is for his close up...hehe!


THE STEPS ::

1.  Cut a 4" x 5-1/4" card front from the yellow "dotted" paper from the Festive Birthday Designer Series Paper.

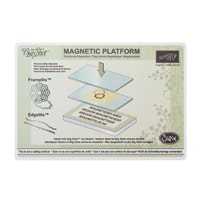
2.  Die cut a large circle (but not the largest) from the Layering Circle Framelits in the upper left corner, approximately 1/3" in from the top and left sides.  Be sure to use the Magnetic Platform to keep the framelit in place while cutting (shown below).


3.  Flip the newly die cut piece of paper over and adhere a 3" x 3" Window Sheet over the opening using Mini Glue Dots (shown below) 

4.  Form some Foam Adhesive Strips over the window opening into a circle.  

Fill the circle with your shaker "ingredients" -- punch hearts using the Confetti Hearts Border, cut some confetti with the Fringe Scissors, and add some Bermuda Bay Sequins (shown below).
 

5.  Remove the tape strips from the Foam Adhesive Strips and add the 3-1/4" x 3-1/4" background from the "hearts and confetti" piece of designer series paper.  

Add a few more strips of Foam Adhesive Strips around the edges of the card front, so everything is the same height once adhered.


6.  Die cut and add the die cut streamers before adhering to the card front using the Fine Tip Glue Pen.  

For a firm hold on the streamers, place two Clear Blocks over the top for about 2-3 minutes (shown below).  Once dry, cut the overhang of the streamers with Paper Snips.


7.  Now, you're ready to remove the tape strips from the Foam Adhesive Strips and adhere the card front to your card base (5-1/2" x 8-1/2" scored and folded in half).  

8.  Stamp your sentiment onto a 1" x 5-1/2" strip of Whisper White cardstock, add a strip of "grass", add your die cut llama and cactus, and you're done!  Yay!


So, what do you think?  I hope you like this card as much I do, and I certainly hope that you consider adding the Birthday Fiesta Stamp SetFiesta Time Framelits, and other coordinating products to your shopping list, so you can have some birthday card-making fun too. 

You will find all of the Stampin' Up! products used to create my card below.  Order what you need by placing your order in my Online Store anytime, or click any of the photos below to go right to that item.

Thanks for stopping by!  Until next time, happy crafting!


Shop in my Online Store (It's open 24/7!)

Up to 60% off Clearance Rack items!


Product List ::

Wednesday, February 24, 2016

Look Who's Turning 29 {Again} & A TUTORIAL!

Challenged by my crafty friends and inspired by a beautiful card in the 2016 Occasions Catalog, I pulled out the Number of Years Stamp Set, Large Numbers Framelits Dies and Shine One Specialty Designer Series Paper and came up with this beautiful Look Who's Turning 29 {Again} Card.

We all have that one friend who makes a big deal about her birthday, right?  She loves celebrating it, but now that she's over 30, she doesn't care about the number.  Well, this card is perfect for these types of friends!


With this card design, I love that I can celebrate my friends and make them feel good about turning another year older without it being about the number.  


The gorgeous designs in the Shine One Specialty Designer Series Paper have my name written all over them, and the Bermuda Bay striped sheet was perfect for this card! 


This card was inspired by the card below in the lower right corner found in the 2016 Occasions Catalog on page 51.  


Want to make this card for your 29 and over friends?  Here's what you'll need to do.

THE STEPS ::
  1. Cut a 4-1/4" x 5-1/2" piece of Bermuda Bay striped cardstock from the Shine One Specialty Designer Series Paper and set aside.
  2. Cut a 3" x 4-1/4" piece of Whisper White Cardstock and stamp the leaves in the Number of Years Stamp Set twice in Cucumber Crush.  Stamp flowers around leaves in Crushed Curry, Pool Party, and Watermelon Wonder.
  3. Stamp the numbers "2" and "9" in Bermuda Bay on Pool Party Cardstock and die cut them with the Large Numbers Framelits Dies.
  4. Stamp "Look Who's Turning" in Cucumber Crush at the top of the Whisper White Cardstock, and stamp "{Again}" in Watermelon Wonder below the flowers.
  5. Adhere the "29" with pieces of Stampin' Dimensionals to add some dimension.
  6. Adhere the sentiment piece to the Bermuda Bay striped card front.  Add a piece of yellow washi tape from the Botanical Gardens Designer Washi Tape to the top of the sentiment piece to bring add more color.
  7. Add card front to a 4-1/4" x 11" piece of Whisper White Thick Cardstock (card base scored at 5-1/2") and add a few Gold Sequin Trim.

Easy peasy, right?!  You will find all of the Stampin' Up! products used to create this card below.  Order what you need by placing your order in my Online Store anytime, or click any of the photos below to go right to that item.

Thanks for stopping by!  Until next time, happy crafting!


Shop in my Online Store (It's open 24/7!)

Check out this week's Weekly Deals!

Up to 80% off Clearance Rack items!


Product List ::
Related Posts Plugin for WordPress, Blogger...