Monday, May 19, 2014

Bravo Way to Go & Tutorial

Hi Crafty Friends!  I hope your weekend was super duper!  Mine sure was because on Saturday, May 17th, the Luv 2 Stamp Group got together for our quarterly meeting.  Lots of fun goes on at these meetings like sharing tips and tricks about Stampin' Up! products, gushing over the new products, swapping, and make 'n takes too!

left to right:  Katina Martinez, Wendy Cranford, Patty Bennett, me, and Cindee Wilkinson
photo credit:  Patty Bennett

Since Patty Bennett, our amazing director and fearless leader of the Luv 2 Stamp Group, was going to be away on the Stampin' Up! cruise the week before the big meeting, so she asked me, Cindee Wilkinson, Katina Martinez and Wendy Cranford to help get everything in order while she was away.  Katina and Wendy gave new product demonstrations, and Cindee and I both created the make 'n takes.  Below is my make 'n take--a fun Way to Go Card!  It's graduation season, so I figured this card would be fitting. 


Make 'n takes always feature new products and/or techniques from the new Catalog, so this card features the new Bravo Stamp Set (I earned it for FREE!), 2013-2015 In Colors Blue Lagoon and Hello Honey, the Moonlight Designer Series Paper Stack, the File Tabs Edgelits Dies, and the Itty Bitty Accents Punch Pack.


The Steps ::
  1. Stamp “Way to Go” in Smoky Slate.  Stamp “you did it” in Blue Lagoon.
  2. Using the Project Life Corner Rounder, round corners of top right corner of Smoky Slate card base and Hello Honey rectangle card stock.
  3. Die cut banner using Banner Framelits from Hello Honey striped card stock.  Adhere banner to bottom left of Hello Honey piece.  Adhere Hello Honey piece to card base.
  4. Using Multipurpose Glue, sparingly add two lines of glue to top and bottom of Basic Gray filmstrip, and adhere to “Way to Go” sentiment.  Adhere filmstrip to Hello Honey piece.
  5. Die cut partial tab from multicolor polka dot card stock with File Tab Framelits.  Adhere tab to top left of filmstrip.
  6. Cut banner ends off “you did it” sentiment piece using the Hexagon Punch.  Adhere with Stampin’ Dimensionals.
  7. Punch 3 stars from Blue Lagoon card stock and adhere with small pieces cut from the edges of Stampin’ Dimensionals.
  8. Add 3 Rhinestones—1 small, 1 medium, and 1 large—in top right corner of Hello Honey piece.
  
This card was fun to create and make, and I hope that you feel inspired to make your own graduation congratulations cards.  You might even consider using the school's colors in your design.

Joy, Julia and Judy at the make 'n take table.

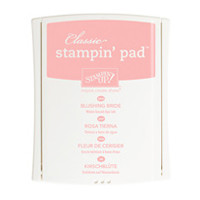
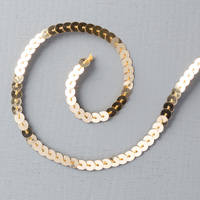
You will find all of the available supplies I used listed and pictured below (new products will be available for order June 2).  Order what you need by going to my Online Store, or click any of the links to go right to that item.

We had a great time at the meeting, and I'll be sure to share more pics later this week.  Until next time, have a great day and happy crafting!

 
Shop in my Online Store (It's open 24/7!)

This Week's Weekly Deals HERE!

Shop the Clearance Rack for New Additions!

Preorder Project Life by Stampin' Up!

Need a Catalog?

SUPPLIES ::

Thursday, May 15, 2014

Eat the Cake Punch Art Card

Hi Crafty Friends!  I wanted to stop by today with a fun card I made featuring one of my favorite pastimes--punch art.  Since I can't get enough of the Birthday Basics Designer Series Paper, I made sure to incorporate it into my design.  


This Eat the Cake Punch Art Card features our Yippee Skippee Stamp Set, Birthday Basics Designer Series Paper, Word Bubbles Framelits Dies and the Cupcake Builder Punch.  


I got my inspiration for this design from a card I saw on Pinterest.  It took only a few minutes to make, and I just love that cupcake with its Bermuda Bay "frosting" and Whisper White "sprinkles."


I just love the sentiment!  It's exactly what I say to my friends when we're out celebrating and one of them is on a diet…especially the birthday girl!


I hope that you like this card and feel inspired to break out those punches and get crafty with it!  You will find all of the supplies I used listed and pictured below.  Order what you need by going to my Online Store, or click any of the links to go right to that item.

Have a great day and happy crafting!

 
Shop in my Online Store (It's open 24/7!)

This Week's Weekly Deals HERE!

Shop the Clearance Rack for New Additions!

Preorder Project Life by Stampin' Up!

Need a Catalog?

SUPPLIES ::

Monday, May 12, 2014

Work of Art Thank You Card

Hi Crafty Friends!  I hope that you had a nice weekend and a happy Mother's Day!  Did your family spoil you to the fullest?  I sure hope so.  My dear father, fiancé and little boy took me to brunch to one of my favorite restaurants in Jack London Square.  Let's just say that we'll be dining in next year.  The service was sloooow, and my food was not made to order.  Call me picky, but it shouldn't take an hour to whip up a few eggs and some bacon, right?!  

Anyway, one of my Mother's Day presents was to come home and craft until my fingers ached.  I can't say they ached, but I sure had a great time crafting.  I played with new stuff and some soon to be retiring stuff too.  


This card, however, is made with all new products.  This card features our new Work of Art Stamp Set, 2014-2016 In Colors Hello Honey and Blackberry Bliss, Moonlight Designer Series Paper Pack, and the File Tabs Edgelits.  Don't you love that tab?!  I sure do!


I just love dies, and this set comes with two tabs and some number dies.  Perfect for making cards as well as mini books!


Inside the card, there's a bit of additional cardstock from the Moonlight Designer Series Paper Pack in a honeycomb pattern in Hello Honey.  Gorgeous, right?!


I LOVE how this card turned out, and I can't wait to play lots more with my new goodies!

Have a great day and happy crafting!

 
Shop in my Online Store (It's open 24/7!)

This Week's Weekly Deals HERE!

Shop the Clearance Rack for New Additions!

Saying Goodbye to some Favorite Products 

Preorder Project Life by Stampin' Up!

Need a Catalog?

Friday, May 9, 2014

Work of Art Mother's Day Card

Hi Friends!  Can you believe it's already Friday?!  This week flew by for me!  In addition to all of the stuff I had on my to-do list, playing with my preorder goodies from the NEW! Catalog was right at the top of the list.  

So far, I have designed one of our team Make 'n Take for our Luv 2 Stamp Meeting next Saturday, played with a few designs for my swap (nothing is working so far!), and this beautiful Work of Art Mother's Day Card.


At Stampin' Up!'s Catalog Premiere that I attended last week, they surprised us with the Work of Art Stamp Set at the end of the event.  It will be in the new Catalog, and each demonstrator got one.  Pretty cute, right?!


This stamp set has great watercolor effects in the form of stamps very similar to the Happy Watercolor Stamp Set, which leads me to believe that Work of Art was it's replacement.  Having both would have been a little redundant, I guess, but I'm super sad to see it go.


Anyway, I needed a Mother's Day card to give to my father's girlfriend.  I knew that Mother's Day was coming, but I kind of forgot that it was coming THIS weekend.  With no time to spare, I turned to Pinterest for inspiration and a quick design, and I found a great card by Pam Strobel.  Her design was perfect for what I needed!


Using the "Happy Mother's Day" stamp that came in April's Paper Pumpkin Kit, the Work of Art Stamp Set, and some gold accents, this card is elegant but also fun.

If you need a last minute Mother's Day card like me, give this design a try.  But since you can't get your hands on the Work of Art Stamp Set yet, then pull out the Happy Watercolor Stamp Set and the Small Heart Punch, and get to work!

You will find all of the available supplies I used listed and pictured below.  You can order what you need by going to my Online Store, or click any of the links to go right to that item.

Happy Mother's Day, have a great weekend and happy crafting!

 
Shop in my Online Store (It's open 24/7!)

This Week's Weekly Deals HERE!

Shop the Clearance Rack for New Additions!

Saying Goodbye to some Favorite Products 

Preorder Project Life by Stampin' Up!

Need a Catalog?

SUPPLIES ::
Related Posts Plugin for WordPress, Blogger...