


Hi Crafty Friends! I'm here today to share my first shaker card, and I am proud to say that it was a success…well, kinda. Please allow me to explain.

I've been seeing oh-so cute shaker cards all over Pinterest and have pinned a few to my Cards :: All Occasions board. Well, I've been dying to make one of my own. So, without reading any directions or instructions on how to make one, I figured I would figure it out as I went along. That's more fun, right?

I ordered Window Sheets just so I could try my hand a shaker card or two months ago, but chickened out every time I sat down to craft. But this past weekend was different. I had tons of free time, which doesn't happen very often, so I figured my time had come to give it this technique a try.

I pulled out the Sweet Taffy Designer Series Paper, the Window Sheets, a few dies and some punches, and went to work.
The Steps ::
- Using the Square Framelits Dies, (a) die cut one square for your sentiment in Whisper White, (b) die cut the same size square from the Window Sheet, and (c) double die cut using two squares (the same size for a and b and the next smaller one) for the top square/window from Sweet Taffy Designer Series Paper.
- Stamp your sentiment onto the Whisper White square.
- Using the edges of your Stampin' Dimensionals, make a frame around the edges of the paper with the stamped sentiment on Whisper White Cardstock, leaving the protective tape intact.
- Using the star punch from the Itty Bitty Accents Punch Pack, punch three (3) stars each in Daffodil Delight, Melon Mambo, and Tempting Turquoise. Lay them on top of sentiment being careful to avoid the Stampin' Dimensional edges.
- Remove the protective tape from Stampin' Dimensional edges and place Window Sheet square over sentiment and stars.
- Place Mini Glue Dots in the four (4) corners of the double die cut patterned square piece and lay on top of Window Sheet square. Set aside.
- Cut 4-1/4" x 5-1/2" polka dot card base and 1" x 5-1/2" striped piece from patterned cardstock. Die cut two banners--1 small and 1 medium--from the Banners Framelits Dies.
- Adhere 4-1/4" x 5-1/2" polka dot card base to Daffodil Delight tent-fold card. Add 1" x 5-1/2" striped piece to right side of card base.
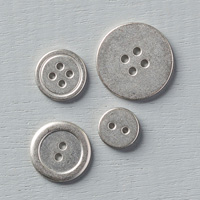
- Adhere shaker frame to polka dot card base. Adhere small and medium banners to upper right corner with Stampin' Dimensional. Finish off with Basic Metal Button, Rhinestone Basic Jewels, and Whisper White Twine. Wallah, you're done!

I promise it was easy! But the next time I make a shaker card, I'll probably use sequins inside the shaker box or circle instead. My stars don't move around as much as I would have liked, but they sure look cute in there. So, what do you think? Do you think you'll give this shaker card a try?
Well, that's all for today, folks. You will find all of the products I used to create this card below. Order what you need by going to my Online Store, or click any of the links below to go right to that item.
Thanks for stopping by! Have a great day, and until next time, happy crafting!

Shop in my Online Store (It's open 24/7!)


2 comments:
Love it, Lisa!
Thank you so much, MaryAnn! I'm glad that you like it!!
Post a Comment
Thank you for taking the time to share your thoughts with me. I really appreciate it!